Now that we've covered the basics of what Airtable is and what literary agents do, we can start getting into the exciting overlap!
The very first thing I set up in Airtable when I became an agent was a submission tracking base. I've since gone on to completely redesign how it works "under the hood" and added several extra bits of functionality to it that are integral to my current workflow, but the gist remains the same. And since this is the oldest part of my JGLM Airtable ecosystem, I wanted to start our tour here.
If you're brand-new to Airtable, this submissions base is a good case study to get a better sense of how it works. I find that it's easiest to learn a new program by seeing it in action!
Two quick notes before we dive in:
Because all the information about my clients' projects on submission is confidential, I duplicated my actual submissions base and filled it in with some dummy data1 for these screenshots. The entire framework is exactly the same as my real submissions tracking base though.
Also, I'm giving you a tour of how this base looks today, but I have some ideas brewing for how I'd like to tweak it further. Everything's always a work in progress! I'll update you later to share the changes I make and why I decided to make them.
Anatomy of a View
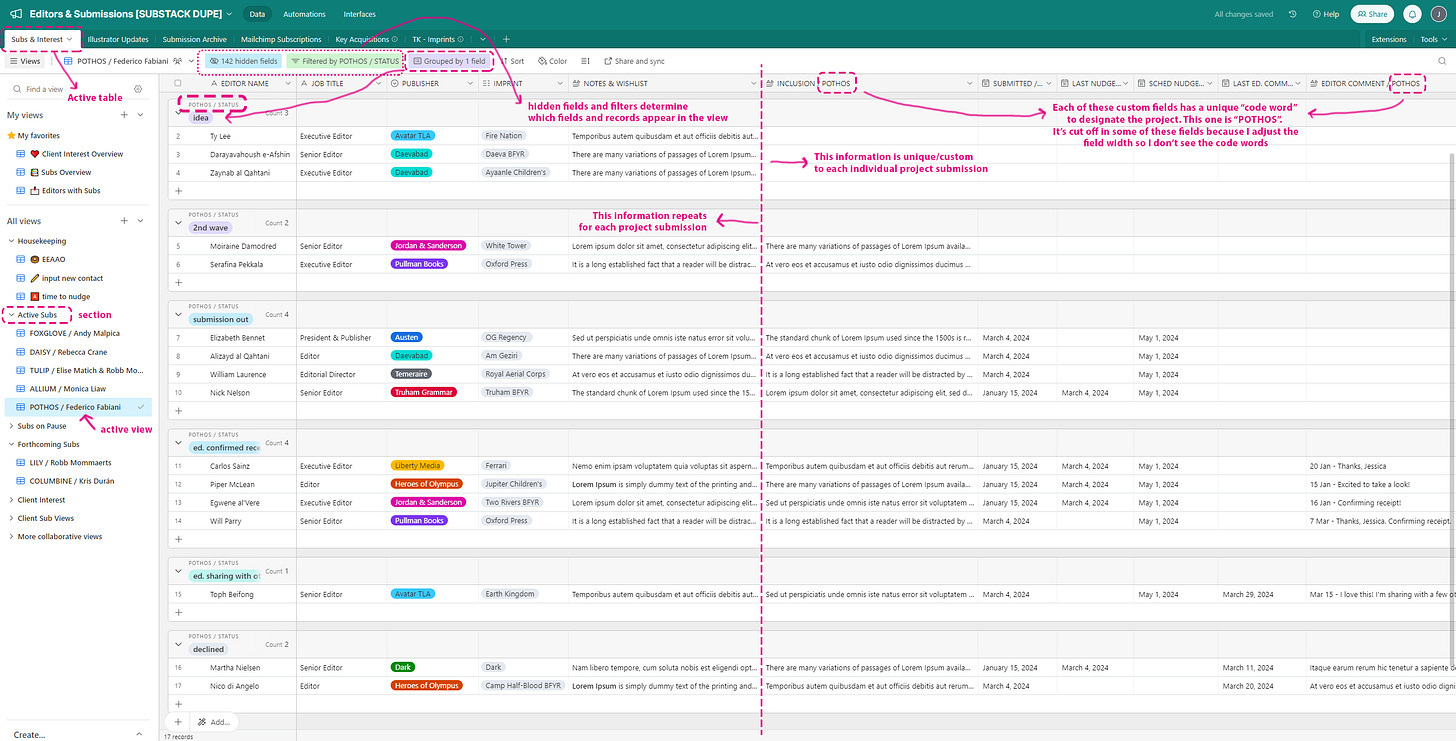
Each of my clients' projects on submission gets its own view. Because I'm on a paid Airtable plan, I can organize my views into sections. I have several sections in this "Subs & Interest" table, but for now let's focus on this (fake!) example project called Pothos in "Active Subs."
Each submission view is created by choosing which fields (columns) and filtering which records (rows) of all available fields/records in the table are visible in this particular view. I'm going to talk more about this below, but for now, I just wanted to point out those sections highlighted in light blue and light green at the top of the grid.
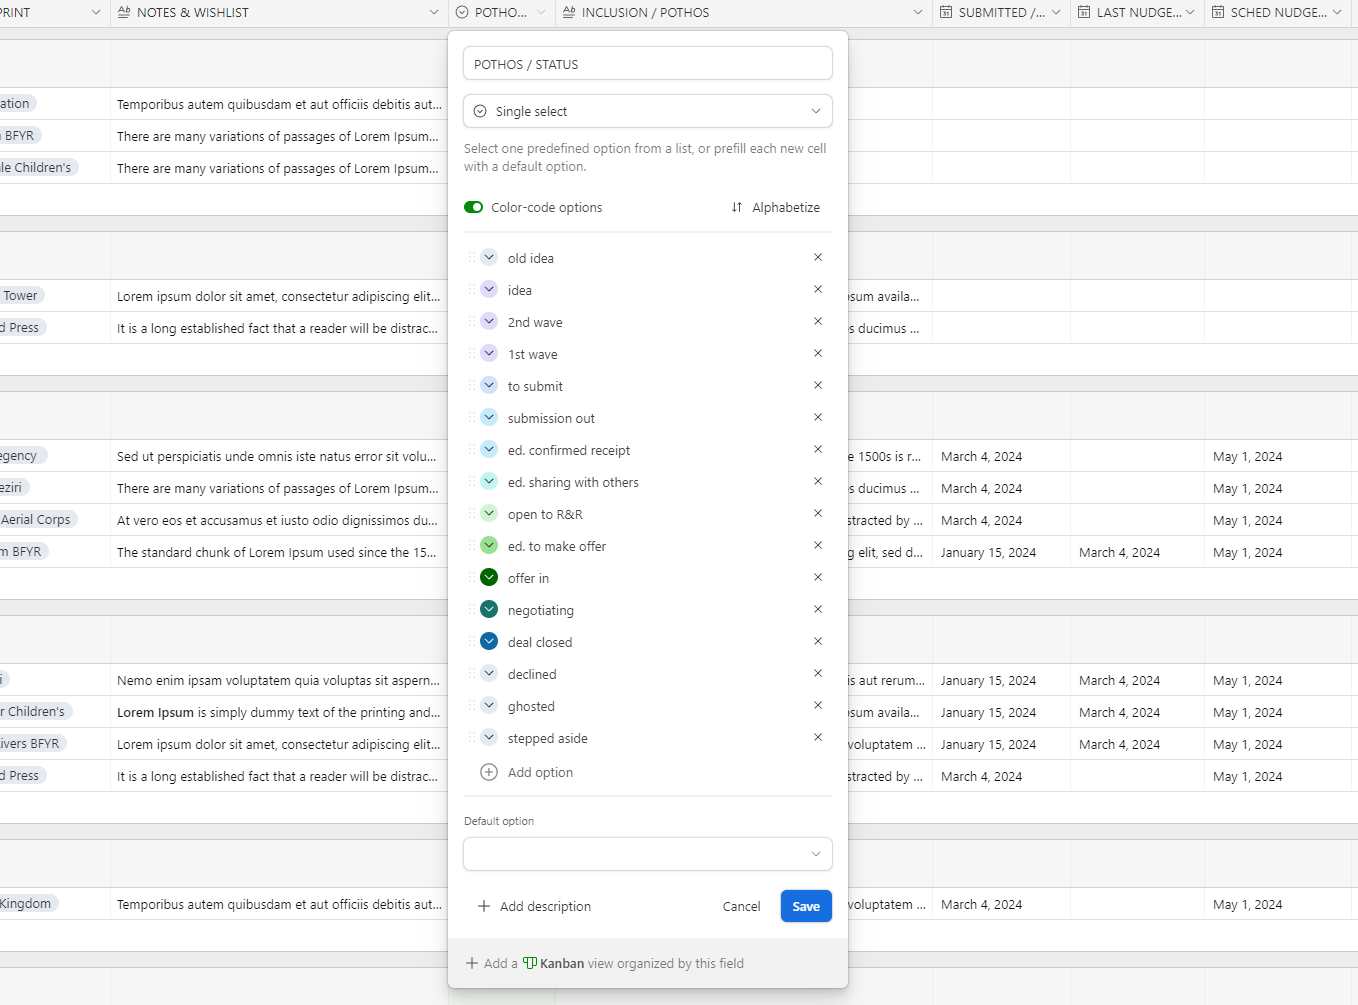
This view is organized into groups. The groups are based on the single select field called POTHOS / STATUS.
I really like the functionality of grouping records. Visually, it works well for my brain to see data organized this way. And whenever the field a project is grouped by is updated, the record automatically moves to the new group. There's a little animation that shows the record sliding into place.
In the screenshot above, I've split the view into two halves – the leftmost five fields are general information about each editor. These same fields appear in all of my submission views for different projects. The first four fields are pretty self-explanatory – name, title, publisher, imprint. The field called "NOTES & WISHLIST" is where I save all the information I keep on file about each editor's tastes and the types of projects they're looking for.2
The other eight fields that appear in this view are specific to tracking this particular submission. Let's take a quick look at each one:
INCLUSION - this is where I write quick notes to myself about why I've included each editor on the submission list. I also share these notes with my clients when I share the sub list with them so they have a bit of context.
SUBMITTED - the date I sent the pitch out to that editor
LAST NUDGE - the most recent date I've nudged an editor about the submission
SCHED NUDGE - the next date I'm planning to nudge. Whenever I submit a project or send a nudge, I update this field to prep for my next nudge. And I have an automation set up to send me a reminder email when this date rolls around so I don't forget. (I'll write about automations in a separate post one day!)
LAST ED. COMM - This stands for "last editor comment" and I use it to mark the date the editor gets back to me with a meaningful comment, like a pass or an update that they are sharing the project with their team. Originally, I used to update this field when editors confirmed receipt too, but I don't do that anymore because of an automation I set up that runs off this field.3
EDITOR COMMENT - I copy and paste whatever the editor says about the project here. Sometimes I'll also summarize key updates and put them in italics, like "Call with client on DATE to discuss editor's R&R notes"
NOTE - this column doesn't show up in the screenshot, but it's a place I put random things I want to remember about the sub, such as "editor is on parental leave from DATE to DATE" or "mark as ghosted if no reply by DATE"
STATUS - this column also doesn't show up in the screenshot, but you can see the data since it's the field that the records are grouped by. I keep it visible in the view so that I can easily change the status while I'm working in this view.
Under the Hood
You may have noticed that in the screenshots, all of those eight fields I just discussed actually contain the word "POTHOS." Why? Let's circle back to the beginning, with hidden fields and filtered records.
Something that I do with many of my Airtable bases is set them up to be very wide4 – in the sense that there are a LOT of fields in one table. For example, I currently have a little over 150 fields in my "Subs & Interest" tracking table that we're looking at here.
That would be totally unwieldy in a program like Excel; you'd get lost in a sea of data. But in Airtable you can slice up that huge underlying table into lots of different bite-sized views, so you're only ever actually looking at a small section of your table at once.
And that's what I'm doing with each individual project submission view – looking at a small slice of what is a big CRM5 table tracking editors and art directors.
So what are all those 150 fields in my Subs & Interest table? Well, a big chunk of them are for each of my clients' projects on submission. In order to have a view like I shared above for each sub, every project on submission needs to have its own field for all eight of those criteria (inclusion rationale, date submitted, etc). And because the type of information repeats (i.e. "INCLUSION") I use a tag or code word to designate which project the field relates to so the field names are all unique.
In real life, I use one descriptive word from the book's title as my tag. For example, spirits was the tag for a project called School Spirits. So the fields for that submission were called INCLUSION / SPIRITS and so on. In my fake data for this dummy base, I used flower names for all the project tags: daisy, tulip, pothos6...
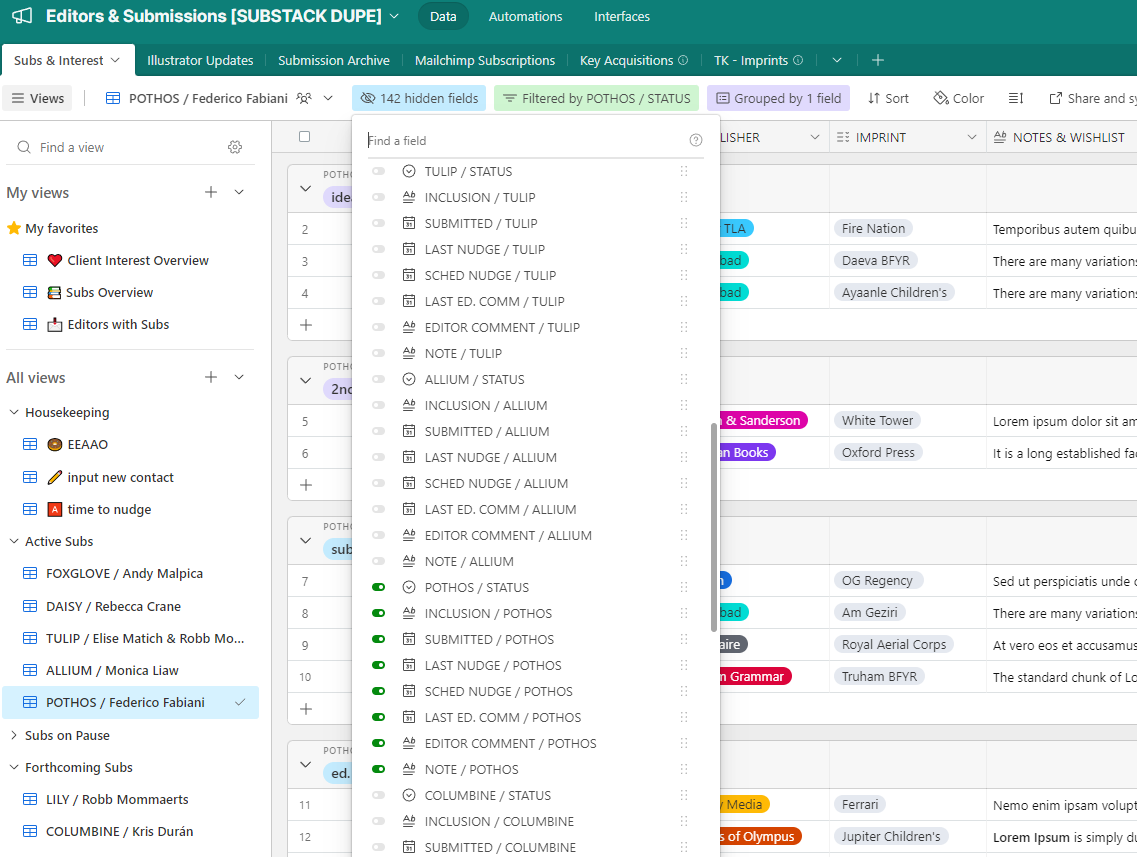
To create a submission view, I toggle off visibility for all the available fields in the table except for the five fields of general information about each editor (name, title, etc.) and the eight submission tracking fields with the project's tag word.
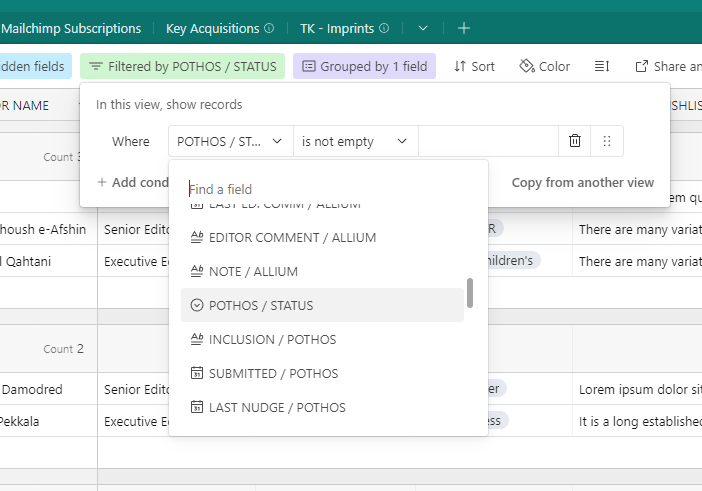
Filtering records is more straightforward. In my real Subs & Interest table, I have over a thousand records. But I only want to see the editors on each project's submission list in my tracking view. So I set up a filter that's based on the sub's status field.
Airtable's filters are pretty intuitive. I have mine set up to only pull in records where the STATUS field for a particular project "is not empty."
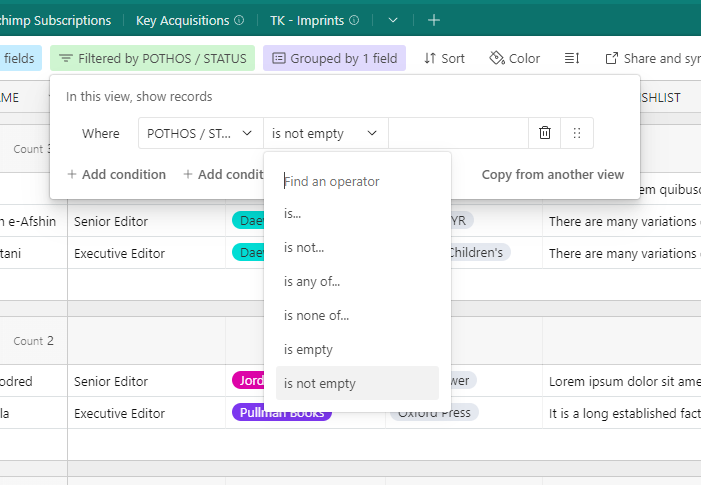
Of course, I only have to set up the view with hidden fields and filtered records once, because views can be saved in Airtable. It's super easy for me to toggle between all my different project sub views and update each grid as new info trickles in.
Sharing the tracking grids
If any of my clients are reading along here, some of you will probably recognize these grids! One of my favorite things about Airtable is that you can create a link to share a read-only version of a view with anyone – they don't even need an airtable account to see it. So I offer to share a link with my clients who want to follow along with their submission.7 (I do turn off the visibility of some fields in my clients' version of the tracking view, such as the editor wishlist field and the nudge fields.)
These read-only share links have a couple of security measures you can choose to use, including needing a password to view. (The password is set for each individual share link; it's totally separate from an Airtable account password.)
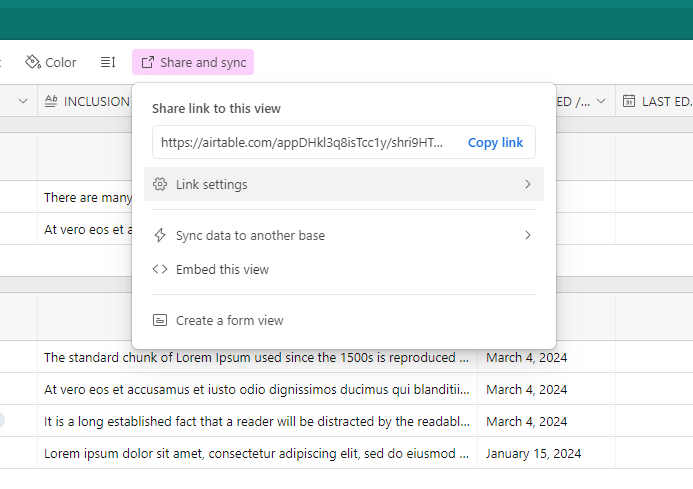
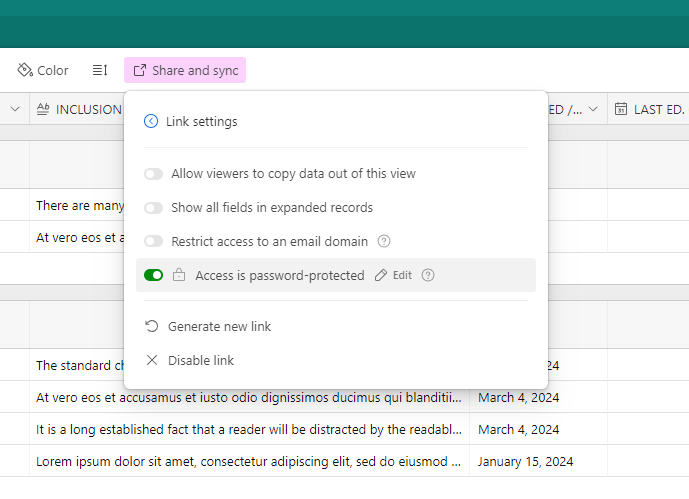
The read-only views are, obviously, read-only – so you don't have to worry about anyone with the link accidentally changing the data in your base. But read-only viewers can manipulate the way information is displayed in their read-only view. For example, you can click into records to expand them, or expand individual cells where some text is cut off (such as with the inclusion notes or editor comments). It's also possible to change the sort and grouping criteria, and change the row height.
But friends! You can see all this for yourself. Go ahead and click around in the read-only view of this base you've been looking at via screenshots for the past ten minutes.
Link: https://airtable.com/appDHkl3q8isTcc1y/shri9HTwktyEXmORr
Password: ArtAgenting+Airtable
There are lots of different ways to use Airtable to track the status of submissions, and this is only one of them. If you're an agent using airtable for your subs, I'd love to hear how you're doing it differently in the comments.
And despite the length of this post, I've actually only scratched the surface of my submissions tracking system. Stay tuned for what I think about when I build submission lists, how this "wide" base set-up helps me avoid doubling-up on submissions to editors, the details on those automations I teased, and more.
Thanks for following along, and if you found this helpful, please share with a friend! See you next week.
Sadly, I have not actually submitted a project to Carlos Sainz. I wish!
I'll probably go into more detail about this "NOTES & WISHLIST" field in my post next week.
Sorry to keep teasing automations. They're very cool and powerful, but they're a whole can of worms onto themselves. So I'm going to cover those down the road.
I'm not sure if "wide" is is a real database term, but it makes sense to me.
CRM stands for Customer Relationship Management. Here, my "customers" are editors and art directors.
I just realized that pothos aren't actually flowers, lol. Whatever, I'm not re-doing the screenshots 😅
Not all of my clients want to have access to every nitty gritty detail of their submission, and that's totally okay! There's always a lot of rejection, and I'm happy to absorb that and only share the highlights with them if they’d prefer.


